Mastering the removal oil tank process can feel overwhelming, but it doesn’t have to be. With the right knowledge and preparation, you can navigate the process safely and efficiently. Whether you’re upgrading your heating system, selling your property, or simply removing an outdated tank, understanding the essential steps involved is crucial. This guide breaks down the oil tank removal process into seven key steps, ensuring you have the tools and insights needed for a smooth experience. From identifying the right professionals to understanding local regulations, we’ve got you covered. Prepare to embark on a journey that transforms a potentially daunting task into a manageable project, safeguarding your property and the environment in the process. Let’s get started on ensuring a safe and hassle-free oil tank removal!
Understanding the Importance of Oil Tank Removal
Oil tank removal is a critical process for homeowners and property managers alike. Over time, oil tanks, whether they are above ground or buried, can deteriorate, leading to potential environmental hazards and costly damage. Removing an outdated or damaged oil tank ensures the safety of your property and protects the surrounding environment from oil leaks and contamination. Proactively addressing oil tank issues can also improve the overall value of your property, making it more appealing to potential buyers.
Removing an oil tank is not just about preventing environmental issues; it also addresses health concerns. Leaking oil tanks can emit harmful fumes, which can seep into your home or business, posing serious health risks to occupants. Additionally, contaminated soil and groundwater can have far-reaching effects, impacting local wildlife and ecosystems. By removing an oil tank responsibly, you are taking an essential step towards safeguarding both human health and the environment.
Another significant aspect of oil tank removal is regulatory compliance. Many regions have strict regulations and guidelines concerning the removal and disposal of oil tanks. Failure to comply with these regulations can result in hefty fines and legal repercussions. Understanding the importance of oil tank removal and adhering to local regulations not only protects your property but also ensures you remain on the right side of the law. Proper removal and disposal also pave the way for future property improvements or redevelopment projects, offering greater flexibility and peace of mind.
Signs You Need to Remove Your Oil Tank
Recognizing the signs that your oil tank needs removal is vital for timely and effective action. One of the most apparent indicators is the age of the tank. Oil tanks typically have a lifespan of 15 to 20 years, depending on their material and maintenance. If your tank is nearing or has surpassed this age, it’s time to consider removal to avoid potential failures. Another telltale sign is the presence of rust or corrosion on the tank’s surface. Visible deterioration can lead to leaks, posing significant environmental and health risks.
Unexplained increases in heating oil consumption can also signal a problem with your oil tank. If you notice that your oil usage has spiked without a corresponding increase in heating needs, it may indicate that the tank is leaking. Additionally, oil stains or wet spots around the tank area are clear signs of a leak. These stains can appear on the ground, floor, or walls near the tank, and they require immediate attention to prevent further contamination.
Unusual odors are another red flag. If you detect a strong oil smell in your home, particularly near the tank or in your basement, it could mean that oil is escaping from the tank. This is not only a health hazard but also a potential fire risk. Lastly, if you are planning to sell your property, a pre-sale inspection may reveal issues with the oil tank that necessitate removal. Being proactive about these signs ensures that you address problems before they escalate, ultimately protecting your investment and maintaining a safe environment.
Legal Considerations and Regulations
Navigating the legal landscape surrounding oil tank removal is crucial for ensuring compliance and avoiding penalties. Each region has its own set of regulations and guidelines governing the removal and disposal of oil tanks. These regulations are designed to protect the environment and public health by ensuring that oil tanks are removed safely and responsibly. Familiarizing yourself with local laws and obtaining the necessary permits before beginning the removal process is essential.
One key aspect of legal considerations is the requirement for proper documentation. This typically includes permits from local authorities, proof of inspection, and records of the tank’s removal and disposal. In some areas, you may also need to provide soil testing results to confirm that there has been no contamination. Keeping thorough records not only ensures compliance but also provides valuable information for future property transactions or inspections.
It’s also important to hire licensed and certified professionals to handle the removal process. Many regions mandate that oil tank removal be carried out by qualified individuals who adhere to specific safety and environmental standards. Hiring unlicensed contractors can result in subpar work, potential legal issues, and increased liability. By working with certified professionals, you can be confident that the job will be done correctly and in accordance with all applicable regulations, ultimately safeguarding your property and the environment.
Preparing for the Removal Process
Proper preparation is key to a smooth and efficient oil tank removal process. The first step is to conduct a thorough assessment of the tank and its surroundings. This includes checking for any visible signs of leakage, corrosion, or damage. It’s also important to evaluate the tank’s location, as accessibility can impact the removal process. Identifying potential obstacles and planning accordingly can help prevent delays and complications.
Once the assessment is complete, it’s time to gather the necessary documentation and permits. This may involve contacting local authorities to understand the specific requirements for your area. Ensure that you have all the necessary paperwork in place before scheduling the removal. Additionally, inform your neighbors and any other relevant parties about the planned removal to minimize disruptions and ensure their safety.
Another crucial aspect of preparation is selecting the right professionals for the job. Research and choose a reputable and experienced oil tank removal company. Verify their credentials, check references, and read reviews to ensure they have a track record of successful removals. It’s also a good idea to obtain multiple quotes to compare costs and services. By taking these preparatory steps, you can set the stage for a seamless and successful oil tank removal process.
Choosing the Right Professionals for the Job
Selecting the right professionals to handle your oil tank removal is essential for ensuring a safe and efficient process. Start by seeking recommendations from friends, family, or neighbors who have undergone similar projects. Personal referrals can provide valuable insights into the quality of service and reliability of potential contractors. Additionally, conduct thorough online research to identify reputable companies in your area. Look for firms with positive reviews, a strong online presence, and transparent business practices.
Once you have a shortlist of potential contractors, verify their credentials and certifications. Ensure that the company is licensed and insured, as this protects you from liability in case of accidents or damage during the removal process. Ask for proof of insurance and check with local regulatory bodies to confirm the company’s licensing status. It’s also important to inquire about the training and experience of the personnel who will be performing the removal. Experienced professionals are more likely to handle the process efficiently and safely.
Schedule consultations with your top choices to discuss your specific needs and obtain detailed quotes. During these consultations, ask about the company’s removal process, safety protocols, and disposal methods. A reputable contractor should be able to provide a clear and thorough explanation of each step involved. Additionally, request references from previous clients and follow up with them to gauge their satisfaction with the company’s services. By carefully selecting the right professionals, you can ensure a smooth and successful oil tank removal that meets all regulatory requirements and safety standards.
The Step-by-Step Oil Tank Removal Process
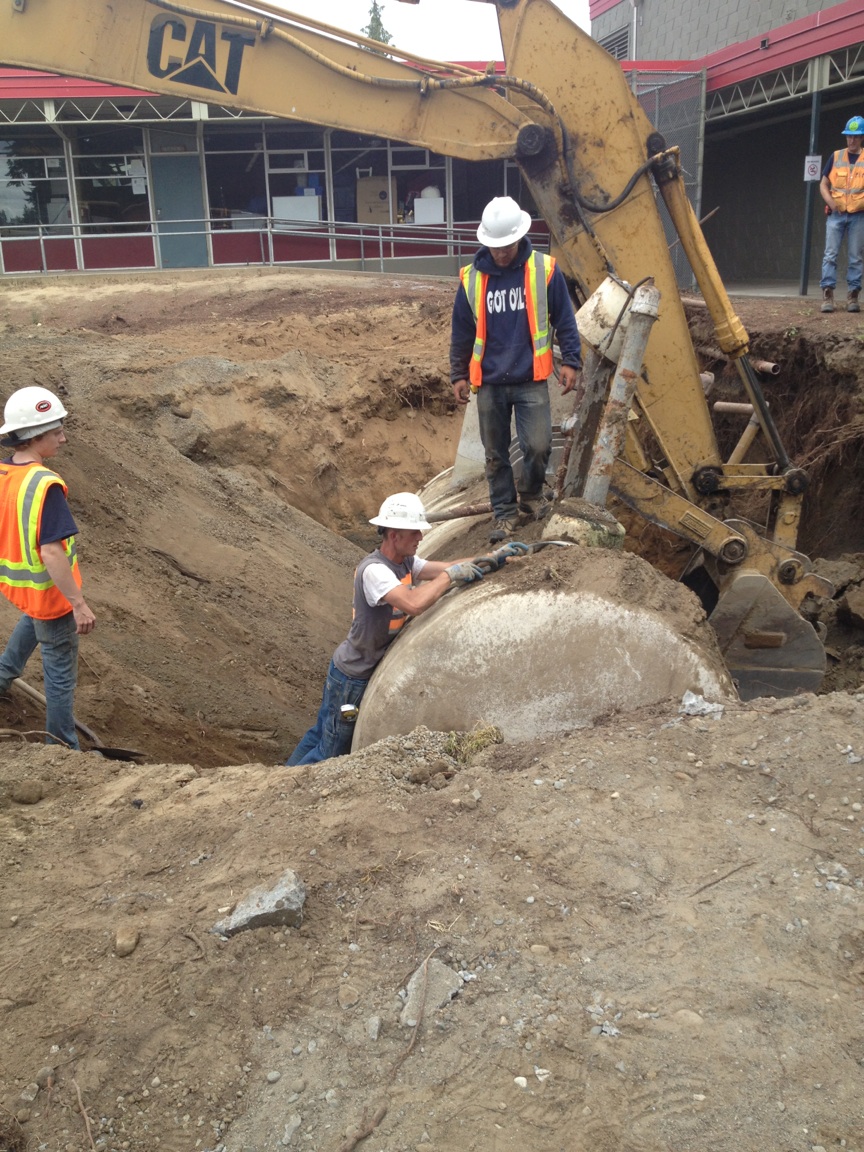
The oil tank removal process involves several critical steps, each of which must be executed with precision and care. The first step is to empty the tank of any remaining oil. This is typically done using specialized equipment to pump out the oil, which is then safely stored or transported for disposal. It’s important to ensure that no residual oil is left in the tank to prevent spills during the removal process.
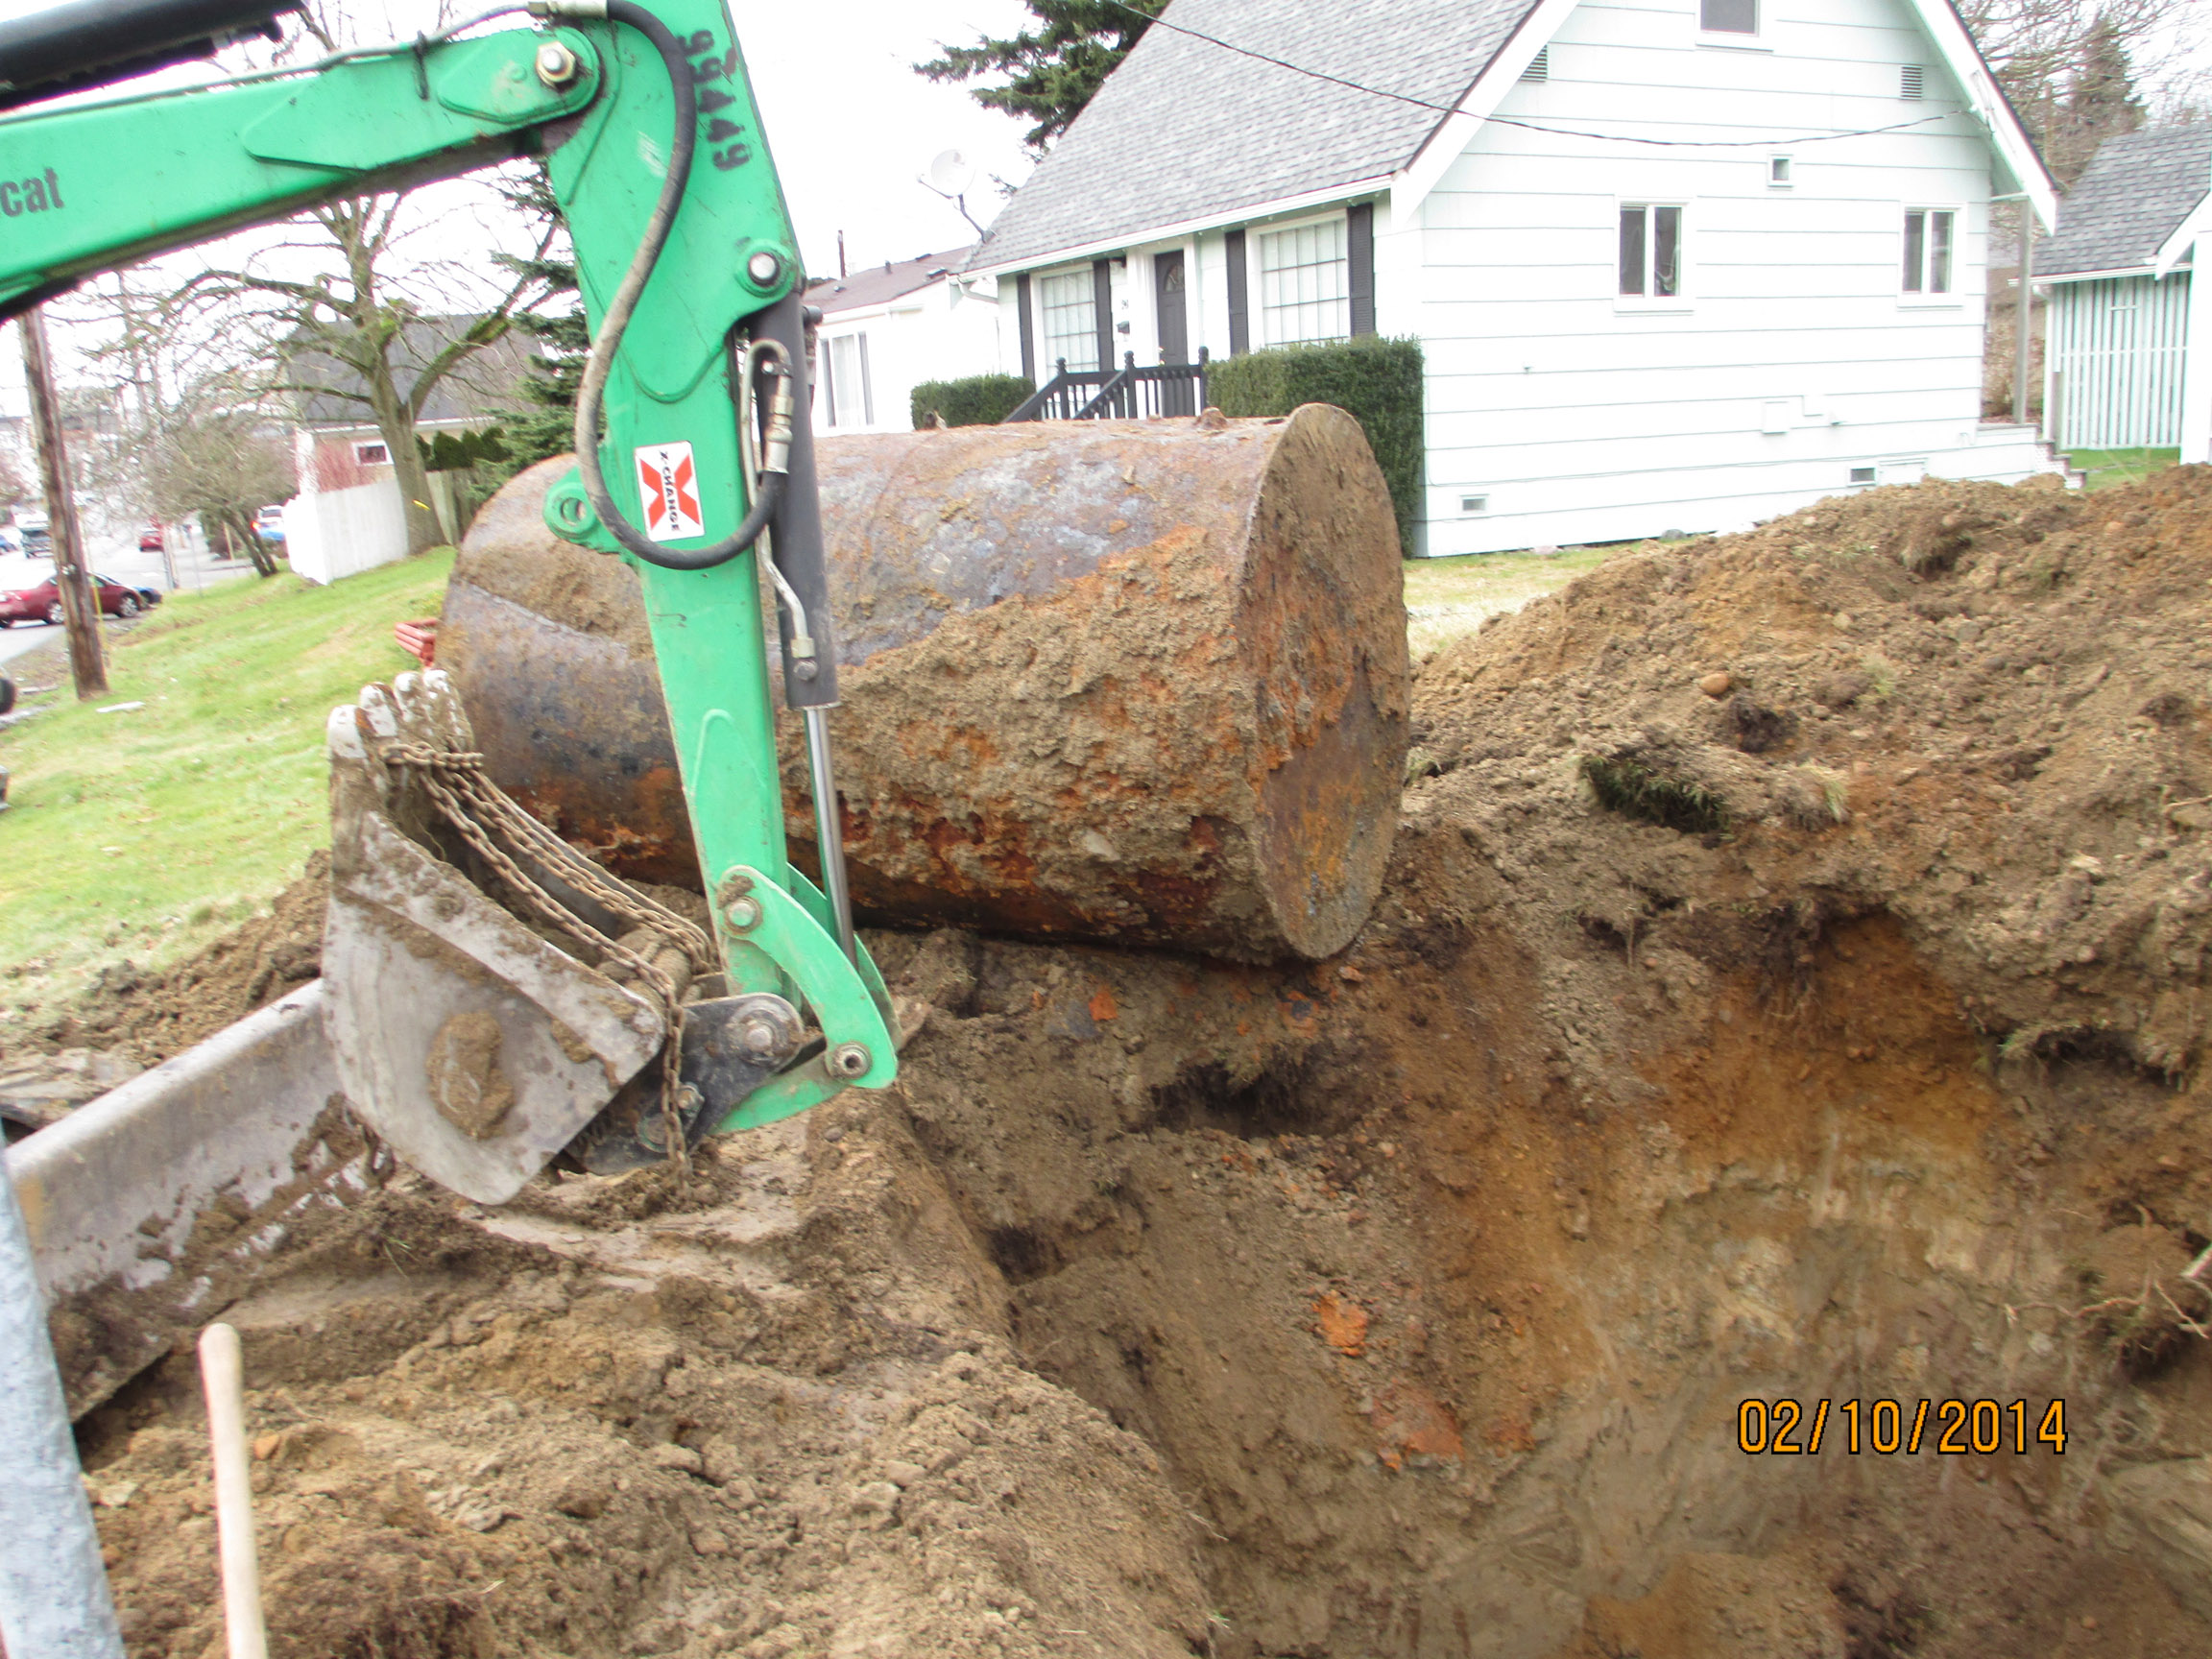
Once the tank is emptied, it must be thoroughly cleaned to remove any remaining sludge or contaminants. This step is crucial for preventing environmental contamination and ensuring safe handling. After cleaning, the tank is disconnected from any connected systems, such as heating or fuel lines. This may involve cutting or capping pipes to prevent leaks. The tank is then carefully extracted from its location. For above-ground tanks, this typically involves lifting and transporting the tank. For underground tanks, excavation is required to access and remove the tank. Special care must be taken to avoid damaging surrounding structures and utilities during excavation.
After the tank is removed, the area must be inspected for any signs of contamination. This may involve soil testing to detect the presence of oil or other hazardous substances. If contamination is found, remediation efforts will be necessary to clean up the affected area. Finally, the tank and any contaminated materials are transported to a certified disposal facility. Proper disposal is essential for ensuring compliance with environmental regulations and minimizing the impact on the environment. By following these steps, you can ensure a safe and effective oil tank removal process.
Post-Removal Site Restoration
Restoring the site after oil tank removal is a crucial step in ensuring the safety and usability of the area. Once the tank has been removed and any necessary soil remediation has been completed, the next step is to backfill the excavation site. This typically involves using clean soil or gravel to fill in the hole left by the tank. Proper backfilling is essential for preventing ground subsidence and ensuring a stable surface.
In addition to backfilling, it’s important to address any landscaping or structural repairs that may be needed. This can include reseeding or laying sod to restore the lawn, repairing driveways or walkways that were disrupted during the removal process, and addressing any damage to nearby structures. Taking the time to properly restore the site not only improves the appearance of the property but also enhances its safety and functionality.
Finally, consider conducting a final inspection of the site to ensure that all restoration work has been completed to a high standard. This may involve checking for proper grading to prevent water runoff issues, ensuring that all contaminated materials have been removed, and verifying that any necessary permits and documentation have been finalized. By thoroughly restoring the site, you can ensure that your property is safe, attractive, and ready for future use.
Common Challenges and How to Overcome Them
The oil tank removal process can present several challenges, but with proper planning and execution, these can be effectively managed. One common challenge is locating the tank, particularly if it is buried underground and its exact position is unknown. In such cases, professional services that use ground-penetrating radar or other detection methods can help pinpoint the tank’s location, reducing the risk of accidental damage during excavation.
Another challenge is dealing with soil contamination. If a tank has leaked, the surrounding soil may be contaminated with oil or other hazardous substances. This requires thorough soil testing and, if contamination is detected, remediation efforts to clean up the affected area. Working with experienced environmental professionals can help ensure that contamination is properly addressed and that the site is safe for future use.
Weather conditions can also impact the removal process. Heavy rain or snow can make excavation difficult and increase the risk of site instability. To mitigate this, it’s important to schedule the removal during favorable weather conditions and to take precautions such as using tarps or other protective measures to shield the site. By anticipating and planning for these common challenges, you can help ensure a smooth and successful oil tank removal process.
Cost Factors Involved in Oil Tank Removal
The cost of oil tank removal can vary widely depending on several factors. One of the primary factors is the size and type of the tank. Larger tanks and those that are buried underground typically cost more to remove due to the additional labor and equipment required. The condition of the tank also plays a role; tanks that are heavily corroded or damaged may require more extensive handling and disposal procedures.
Another significant cost factor is the level of contamination present. If soil testing reveals contamination, additional remediation efforts will be necessary to clean up the affected area. This can significantly increase the overall cost of the removal process, as it involves specialized services and equipment. Additionally, the cost of obtaining necessary permits and complying with local regulations should be factored into the overall budget.
Labor and disposal fees also contribute to the total cost. Hiring experienced and certified professionals ensures that the job is done safely and in compliance with all regulations, but it may come at a higher price. Disposal fees for the tank and any contaminated materials must also be considered. By understanding these cost factors and obtaining detailed quotes from multiple contractors, you can budget effectively and ensure a successful oil tank removal within your financial means.
Conclusion: Ensuring Safety and Compliance
Ensuring safety and compliance during the oil tank removal process is paramount for protecting your property, health, and the environment. By understanding the importance of oil tank removal, recognizing the signs that indicate a need for removal, and familiarizing yourself with local regulations, you can navigate the process more effectively. Proper preparation, including choosing the right professionals and obtaining necessary permits, sets the stage for a smooth removal experience.
Following a step-by-step removal process, addressing post-removal site restoration, and anticipating common challenges further contribute to a successful outcome. By considering the cost factors involved and budgeting accordingly, you can manage the financial aspects of the project with confidence. Ultimately, taking a proactive and informed approach to oil tank removal ensures that you maintain a safe, compliant, and environmentally responsible property.
Embarking on the oil tank removal journey may seem daunting, but with the right knowledge and resources, it can be transformed into a manageable and rewarding project. By prioritizing safety, compliance, and thoroughness at every step, you can achieve a successful oil tank removal that safeguards your property and contributes positively to the environment.